How to Blog on Squarespace - Everything You Need to Know.
As a small business owner, you are already responsible for planning, strategy, accounting, customer service, human resources, compliance and legal and marketing. Now you are expected to be an engaging copywriter, content marketer and website stylist too?!?!? Anyone ever feel like it is all too much?
Oh, I totally get it.
It's like juggling 🤹♂️ knives ... flaming, burning knives with little mad squirrels tied to them all ready to bite, right?
But hey, don't sweat it.
I've got some handy tips to make this whole blog writing thing a lot less of a headache. So before you start that grim battle with the keyboard, take a moment to read this post. I'll provide you with a step-by-step guide on how to build the perfect blog post on Squarespace, covering everything from finding your keywords, writing your content, styling your blog post and how to get it published.
Buckle up ... it's a long one!
But, before I dive into that – who the rubber duck 🐥 am I? If we haven't met before, I’m Shaz and I run Elmtree Digital Marketing. I’m a Squarespace designer and educator and have been building websites for eons. I’m a solopreneur since (ahem … let’s just say a long time ago). I’ve seen lots of good design and lots of not-so-good design and now I help small business owners get seen + noticed + remembered online with great design on easy-to-maintain squarespace websites. If that’s of interest to you …
👇read on …TABLE OF CONTENTS Show


PRO TIP: I know you want to write a perfect blog post - but there is NO such thing. And I promise you, done is better than perfect.
I’ve put together a list of everything you need to do when writing a blog post - but it’s a big list and I don’t want you to get overwhelmed. If you spend too much time trying to make your blog post perfect, chances are it will take too long to finish and you won't have an article to publish.
So don't stress about getting everything exactly right the first time around. Just start writing and allow your creativity to flow!
You can always come back and fine-tune later.
PART ONE: MASTERING THE ART OF CONTENT
In this section, we are going to tackle how to find your target keywords, how to write a killer blog post title, writing the rest of your blog post content, adding a call to action and the important step of editing!
Let’s go.
Identify Your Target Keywords
The whole reason you are writing a blog is to get more eyes 👀on your business, right?
You do that by writing content that is insanely valuable to your audience but also that shows up in search engines.
How? The answer is simple: Target the right keywords.
Hold on a minute, if your eyes are glazing over and you are feeling like this is already way too technical, then just skip ahead to the part where I show you how to pick your blog post topic.
But, I hope you'll give this next section a read because it is really only a few steps, using free tools and it will boost your traffic. Pinky promise!
Still here??? Awesome sauce!
When it comes to SEO, targeted keywords are everything. You need to choose words that people will use when searching for the topics that you are writing about.
"Target keywords" are the specific keywords that you want your blog post to be discovered for.
Here’s how I went about finding the perfect keywords for this blog post where I knew I wanted to write about the general topic of blogging.
Start with Ubersuggest or another keyword research tool
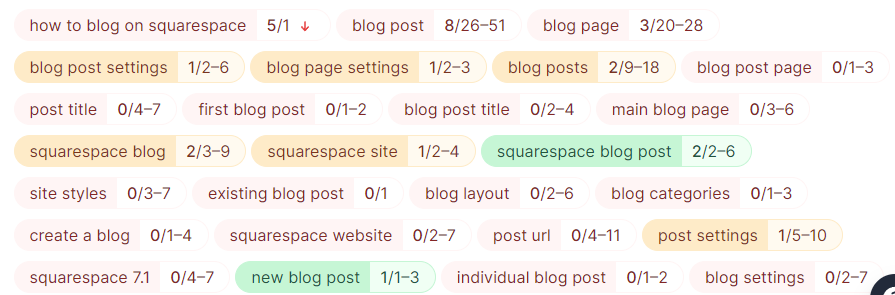
Using a free chrome extension called Ubersuggest, I could see that in Canada, over 30,000 people a month search for the keyword blogging. Jackpot, right? 🤑

Well, not so quick. It also has a search difficulty (SD) of 73 and I gotta tell ya, unless you are Forbes or the New York Times - that's way outta my league.
So I got more specific and googled, "squarespace how to blog". OK, only 170 people per month looking at this term, but the difficulty has dropped way down.

That is still kinda high (I like a search difficulty of 30 or less), but it's better. So I do a bit more digging and check on "how to blog on squarespace". Surprisingly only 10 people looking for this term, but the search difficulty has dropped way down to 18.

Now, some people might scoff at a volume of 10 - but my attitude is if 10 new people knocked on my office door today, I'd be thrilled. Plus, by picking a keyword that has low difficulty, I can gain some traction around this topic and then start building up my topical authority which will let me expand out to more difficult words soon.
Double-check your findings with a Google search
Now it's time to do my next check. What does Google think?
I put the search term into the Google search bar and see what comes up on page 1.

I can see Squarespace (the company) is ranking for this term. That's to be expected.
I can also see some of my favourite YouTubers have got videos up including Louise Henry and Paige Brunton. That's good company to be in.
As I scroll down, I can see there are quite a few "smaller" websites that are listed on Page One of Google. Quite a few I have never heard of and some of the blog posts date back to 2018 and 2019 ... so maybe there is room for me.
Check the domain authority of competing sites
So using the free version of SemRush, I pop in their domains and I can see that several of them have similar domain authority to my sites, so I decide to give it a go.

After all, it's a topic I want to start digging into and one I know is important to my clients. After all, I don’t just blog for Google results - I blog because I have something to share with my clients.
🎯 Keyword Locked In: How to Blog on Squarespace
Where to use my keywords?
You’ve done the hard work to find your keyword - but where do you use it (or relevant variations)? Use your keyword in the:
blog post title and at least one H2 header (near the top of your post).
approximately every 200ish words throughout the post.
file name and alt text for your images
blog post seo title and meta data
in the internal linking tag on other posts that link back to this post
in your post url
A second option if you don’t want to hunt for keywords
Did you skip the section on keywords and you landed right here? That's ok. I feel you.
When I started blogging I was exactly the same. Keywords felt technical and way too overwhelming like I was getting into a deep dark hole of Google search algorithm complexity.
So if you just can’t be bothered with keyword research, pick a topic that you want to write about and try and niche it down to be specific to your audience. Think about the problems they have, the questions they ask and the challenges they face.
For example, I've heard my clients say, "I don't know how to create a squarespace blog post". So, that's what I am doing in this post - walking you through the steps.
🎯Topic Chosen: How to Create a Squarespace Blog Post
Next up? We need to craft our content post. Let's do it! 💪 🤙 ✨ ✌️ 🙏 😊😊😊
Craft Your Blog Post Title
A strong title can be the difference between a successful post and one that's quickly forgotten. That's why it's essential to create a killer title.
Use powerful and action-oriented verbs in your title. Once you've got the title, keep in mind that the introduction paragraph is the most crucial, and it must be engaging to hook your audience. Make sure your opening is pithy, clear, and unusual.
This is where a tool like ChatGPT or Jasper can really be a time saver. I have the paid version of Jasper which lets me create a brand voice and a knowledge base so the AI can learn all about me and the way I write. Using chat, I can quickly generate a list of titles to choose from.
I gave Jasper the command: You are an expert copywriter. Craft a headline for an article about How to Blog on Squarespace. Provide 10 examples. I asked Jasper to enhance the prompt and use my tone of voice and here's what it came back with.

All I need to do is pick my favourite and I'm ready to move on.
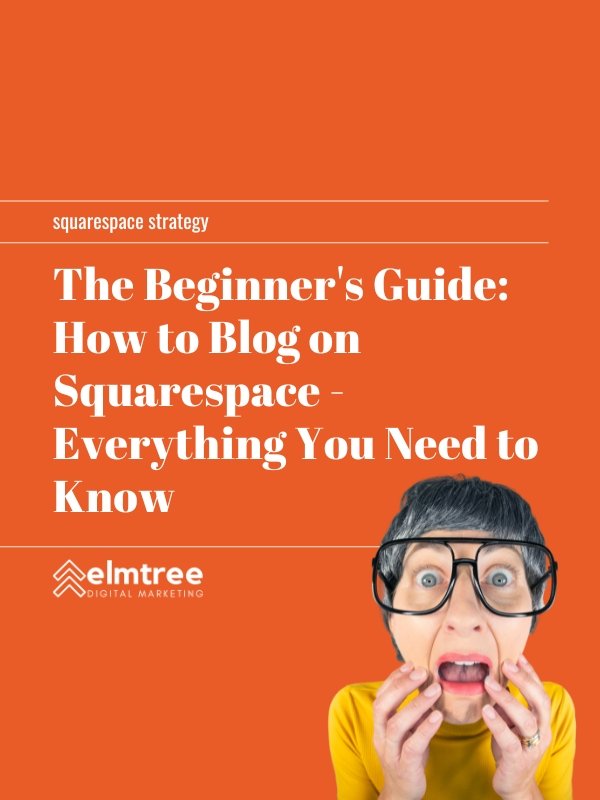
PS - I picked number 6 and then tweaked it so that it included my EXACT Keyword.
🎯Blog Post Title Chosen: The Beginner's Guide to How to Blog on Squarespace: Everything You Need to Know.
Instead of spending hours agonizing over which words to use, I let the AI do it's thing and get back to the writing quickly.
PRO TIP:Use the selection of titles in the content or caption of an upcoming social post and ask your followers their opinion. They can tell you if it gets their attention or not.
Write Your Blog Post Content
Now that you have your keywords and your title, it's time to start writing your post. Again, AI can really help your process here.
I use a combination of Jasper and Surfer SEO to write my posts.
(Gasp! 😯You mean this isn't all me? Nope ... everyone need's a helping hand and these tools are in my pocket).
Jasper, with its AI-powered technology, can help speed up the blog writing process significantly. With Jasper's AI, you can quickly generate ideas and topics for your post in a fraction of the time it would take to do it manually. It also helps you stay on track while ensuring that your posts are SEO compliant and optimized for search engine discovery.
There are lots of AI tools out there, including: Aylien for content analysis, Grammarly for grammar checking and editing, Hemingway Editor for readability scores, SEO Content Machine to mix up your text and keep it from “looking like a robot”, WordAi which uses Artificial Intelligence to generate unique articles. Take your pick and use one of these tools to get started.
Once I have my post drafted, I upload it into Surfer SEO to analyze the content. Surfer SEO is a great tool for optimizing posts and blog articles for search engine ranking. It helps you tailor your post to reach its full potential by suggesting things like keywords, images, and links that could help boost your rankings on SERP listings.
Surfing SEO gives me insight into the competition. I can see how my post is stacking up against the competition. It also offers recommendations for words that are commonly used in high-ranking posts.
I use it while I doing my final writing (don’t just rely on the AI output - you still need to infuse your blogs with your own content, personality and flair!) I've got it running right now on this post and here is what it is showing me:

It even tells me what content tweaks I need to make in order to improve my ranking:
So I keep writing, editing, and asking for help from AI until I'm happy with my blog post.
PS. I'll let you know down at the bottom of this blog page what my final score is.
Include Your Call to Action
Your Call to Action, also called CTA, is crucial to your post's success. If you are looking to increase your email subscriber or promote your product, use your CTA to attract your audience. Include them in between or at the end of your article.
Some examples of a CTA are:
Sign up for our free 1-week trial
Download your bonus checklist
Join us in the members only forum
Follow us on social media
Make sure your CTA is relevant to what you are writing about and be sure to include a link. This link can lead people back to your website, or even link to another existing blog post, or it can be a link to a landing page site where you are promoting something.
Edit Twice
After writing the post, it's time to edit with a fine-tooth comb. The last thing you want is spelling mistakes or bad grammar. Tools like Grammarly and Hemmingway ensure that your writing sounds professional and polished.
Pro Tip:Read it out loud.
When reading your post aloud, you can easily spot any uncomfortable phrases or places where the flow of the writing is broken up.
Use software like Speechify to read your blog post out loud and double-check for errors. Listening to your post can help you spot mistakes quickly, as well as give you a better sense of the flow of your writing. Listening to it back can also provide insight into how you are conveying your thoughts, which is invaluable when it comes to nailing your message.
Your first blog post is ready! Now it's time to use your site styles and focus on the blog layout. 🌸💮🪷
PART TWO: MAKE IT PRETTY
Use Site Styles to Create a Beautiful Blog
Styling your post involves looking at how your content appears on your Squarespace website.
Keep your paragraph short, and use headings and subheadings to break up text and make it easier to read.
Add images to emphasize points and enhance your content (more on this below).
Dividers can help break up each blog section and make your whole post easier to read.
Site Styles can be used to create formatting that applies to multiple posts on your Squarespace website.
On the page, you can use text styling to add visual interest to your post.
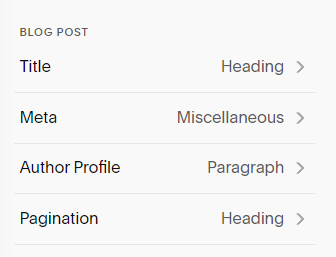
Setting blog post styles in Squarespace 7.1
These style settings will affect ALL blog post styles within your website - so choose carefully, especially if you use blogs for multiple purposes like resource downloads, testimonials, or portfolios.
On the top right side of your blog post, click the paintbrush to open up Site Styles. Choose Fonts. The Fonts menu will open.


Scroll down to find Assign Styles. The Assign Styles menu will open


Scroll down until you find Blog Post. This will allow you to adjust the global blog settings for ALL of your blog pages. It is a global setting across your entire site.
Using on-page settings to format fonts
You can also use the on-page editin
g function to style your blog post. If you are looking to add some flair, check out this blog post on 3 Eye-Catching Text Tweaks to Use on Your Squarespace Site. No Code Required!.

You can change text types, use bold, italic and colour options, stretch or underline your text as well as justify it, turn it into a quote or more!
Add In Images
Images play a crucial role in your blog post's presentation and it's essential to include them both for your readers and for Google. Here’s some key points in using images on your Squarespace blog (and really across your entire Squarespace website).
Optimize your images
👇 This is important 👇
Do not forget to take the time to optimize your images for size ensuring that no one image is bigger than 500kb (ideally all images should be under 250kb - only use the larger size if you need it for readability) and the overall page size is no more than 1mb.
And before you load your images, take a few moments to rename the file to something descriptive of the image and relevant to the content of the page. This will help with SEO, as search engines use the file name description in their algorithms.
Finally, once you have uploaded your images and added them into your blog post, it's time to add Alt Text. Alt text is a few words that describe what is happening in the image (eg. woman looking at laptop).
Google may use the alt text in place of the file name if it is available and screen readers use the at text when converting your website to text for those with limited vision.
I can tell you from experience …
… thinking that you will come back later and do this step is a bad move! Take the time to do it now and save yourself the energy, hassle and even money in the future.
☝️Learn from my poor choices ☝️
Where to find images and graphics
While beautiful original imagery should always be your preferred option on your website, it is not always possible.
Graphics
If you are looking to create graphics quickly and easily, I highly recommend Canva! They have lots of templates that you can customize with a few clicks.
Stock Images
If you need free stock images, check out:
Unsplash (There is a free integration with Squarespace making this super easy to use)
Add a Table of Contents for Long Form Content
Adding a table of contents to your long-form content can help users scroll through your post's outline and click on any of the links to be taken directly to that section. It increases readability and the user experience which encourages them to stay on your page longer.
For a long time, I created mine manually by adding in anchor links to jump to specific text points in my blog. To be honest, it’s a pain in the a$$.
So recently, I found an inexpensive plug-in and have started using it. You can see it at the at the top of the page.
Here is the plug-in. It’s a very reasonable price if this is a blog feature that you need.
Add Internal Links
Internal links provide your readers with additional, related content and help improve the overall user experience on your website. This will also help search engines to understand the relevance of the content that you are publishing.
A great way to include internal links in a blog post is to link back to older posts that may be relevant and add value for your reader.
Best practices with internal linking is to ensure that you are not overdoing it. Internal links should be used to supplement your content, not as a way to "stuff" the post full of links. Aim for 2-3 internal links per blog post (that's 2 to 3 out and 2 to 3 inbound).
Make sure you link to relevant posts as much as possible. This will help visitors find more information related to the topic they are reading about, and it will also help to create a better user experience.
If possible, Use the target keyword of the post you are linking to as it will give Google a strong indication of the content. The key here is to link naturally. As you write your post think of content you have published that adds value to the conversation and use those links. If you struggle with this, take some time and review your blog index for posts that could be relevant.
Pro Tip: Does all this styling seem like a whole lotta work? One option is to create a Squarespace template for your blogs. You can leave it unpublished and then simply start each blog with the template rather than from scratch. You can take the time to add in the main styles, look and feel that you like along with any *sections that you want to duplicate.
I’m using the word sections here pretty loosely because as of Sept 2023, Squarespace still uses the classic editor for individual blog posts. Unlike in fluid-engine, you can’t use the full drag and drop editor or create favourite sections that you can use repeatably in your blog posts. You can find the specific styling options here for blogs in Squarespace 7.1.
(📢 come on Squarespace ... we are waiting on fluid-engine for blogging).
If you do go with a template option, be aware that when you duplicate the blog - you are also duplicating the setting items like blog categories, the blog excerpt, the blog title, and even the post url. You will want to go into the settings section and ensure you update each of the features.
Your blog post is beautiful! Now let’s get it published! 📢🚀📈
PART THREE: YOUR BLOG POST SETTINGS
We are on the home stretch now!
Now that we have our content and styling ready to go - it's time to look at the blog post settings and get ready to publish.
You will find these settings on your blog post collection page. Click the 3 small dots next to your blog post to open up the settings panel.

Content Settings

Featured Image
A Squarespace featured image represents the main photo or graphic associated with your blog post. This image typically appears at the top of your post and can also show up in other areas of your site, like your homepage or blog archive, and in social media shares or search engine results. Choosing a compelling featured image is crucial as it sets the tone for your blog post, helps convey your topic visually, and can grab people's attention when shared on social media or displayed on your site. Remember to optimize your featured image's size and provide a relevant file name and alt text for SEO and accessibility purposes.
When styling your blog coverage, you will be able to choose the aspect ratio of the images to be displayed. Design your featured image to fit the ratio you choose to be sure there are no unexpected cropping or display issues.
Here are your size options:

1:1 SQUARE
Dimensions: 1080 x 1080

3:2 STANDARD
Dimensions: 900 x 600

2:3 STANDARD (VERTICLE)
Dimensions: 600 x 900
3:4 THREE-FOUR (VERTICLE)
Dimensions: 900 x 1200

4:3 FOUR-THREE
Dimensions: 1200 x 900

16:9 WIDESCREEN
Dimensions: 1600 x 900

ULTRA WIDESCREEN (21:9)
Dimensions: 2100 x 900
Excerpt
The excerpt is a two to three sentence summary of your blog post. It’s often used on the blog cover page to encourage the viewer to click through and read more. It will appear under the thumbnail and above the "read more" button on . Its purpose is to give readers a sneak peek or a summary of the post, enticing them to read the full content so make it short and snappy and compelling.
Similar to the featured thumbnail image, it will show up on the blog post summary or when shared on other parts of the site or online. If you can, try incorporating some keywords into the excerpt, but make sure it flows naturally.
Post URL
Squarespace will automatically generate a URL (usually based on your blog post title). Google tends to favor shorter URLs, ideally between 50 to 60 characters maximum. To optimize your URL, ensure that it includes relevant keywords while maintaining a natural and concise tone. You can skip words like the/to/at and it’s best to use - between each word.
For example, www.elmtreedm.com/blog/blog-on-squarespace
Source URL and Link Post Title to Source URL
Occasionally, you may want to link a blog post out to another site, for example, if you have written a guest post on someone else’s blog. You can share the URL here and toggle the option to link the title to the source URL.
I rarely use this option as I typically don’t want to send my reader away from my site. Rather, I would write a short summary blog post on my site and then within the blog post, include an external link (which opens in a new window) to the guest post.
Duplicate and Delete
These are pretty self-explanatory, but if ever you need to duplicate a post - this is where you would do it. Be aware that when you duplicate, you duplicate not only the post content but also all of the settings.
Delete … well, it deletes. ❎
Option Settings

Status
Status determines if a blog post is live or waiting to go live on the web. You need to update the status before you publish.
If you have been writing your blog post but are not quite done, set the status to draft.
In review can be used if you need a second editor to have a look at the post before it goes live.
Published makes the blog post immediately available online.
Scheduled allows you to set a blog post to a future date. I use this when I batch my writing creating multiple blog posts at the same time. This allows me to schedule them according to my content strategy.
Tags & Categories
Adding categories and tags help you sort and add search capabilities to your post. This will help visitors locate what they're searching for more quickly and seamlessly.
Think about categories as larger groupings of topics that your posts will cover. These can be aligned with the major activities that your business is active in. For example, if you run a yoga studio - you might blog about the 5 main types of yoga: hatha, Iyengar, vinyasa, hot yoga, and ashtanga
Tags are much more detailed. In our yoga example - you might tag your videos as aerobic, cardio, hot yoga, or even by specific position and stance.
Pro TipHere's a tip: I always recommend hiding the category and tag pages from search to avoid any negative impact on your SEO. Squarespace tends to create a page for each tag you use in every category, which can harm your SEO efforts. To do this, access your Blog page settings, click the cog icon next to your blog at the top of the menu, and go to SEO. Scroll down and toggle the option to hide category and tag pages.
Comments (on / off)
You can allow comments on individual blog posts.
turn on blog comments globally in Settings > Blogging
choose to enable comments on a post
Featured Post (on / off)
Did you know that you can make any post a featured post? This feature is especially handy when using a summary block in Squarespace. A summary block allows you to showcase collections like blog posts, and you can easily set it to display your featured posts. Personally, I love using a summary block at the top of my main blog page. It adds a nice touch to my website and allows me to drive traffic to a specific blog post.
SEO Settings

Let’s start with a correction. The SEO settings section says “optional” after the SEO title and description but it really isn’t. It only takes a minute to add these.
SEO Title
Here's how you can encourage Google to display a specific title and description for your blog posts in search results. There is no guarantee that if you add a title, Google will use it, but best practice is still to include it.
SEO Description
As for the SEO description, I write a summary using the keywords I've used in my post, aiming to make it captivating enough for readers to click through to my post. Again, Google may not always use your SEO description but it is still best practice to include it.
Social Image Settings

Alternate Social Sharing Image
When you share your blog posts on social media, an image frequently accompanies the post title. A prime demonstration of this occurs when you share a blog post link on Facebook. It's a neat little feature that can help catch people's attention and make your posts more engaging.
Usually, the image that is shared is the blog post thumbnail but if you want it to be something else, you can add a different image here to be your alternate social sharing image for this particular post.
But here is the frustrating part, each social platform has its own recommended dimensions:
Twitter - 1024 x 512 px (caveat: images are cropped on the mobile app and are displayed at a 1.75:1 ratio)
Facebook - 1200 x 630 px
LinkedIn - 180 x 110 px
You can drive yourself crazy trying to find the perfect solution.
Here’s what I use: 1600px by 900px works well for Facebook and Twitter. I add generous padding on each side of the image (to ensure the subject of the photo is not on the very edge) to make sure it also works for LinkedIn.
Share Settings
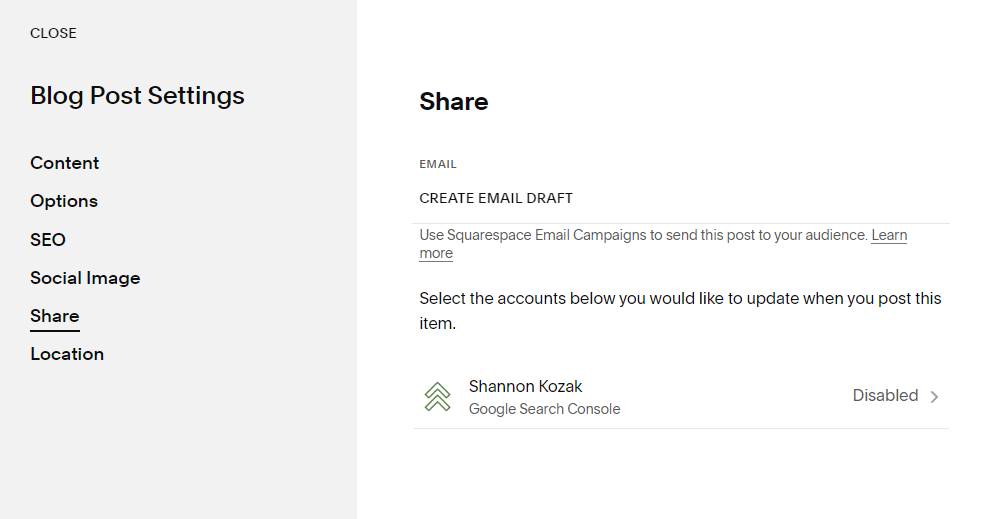
Email Campaigns
With just one click, you can effortlessly begin composing an email highlighting your blog post. Simply navigate to Marketing > Email Campaigns, and Squarespace will automatically generate an email draft in your drafts folder. This feature allows you to easily send it out to your mailing list.
Share to Connected Accounts
When it comes to Squarespace, you have the option to not only draft emails but also connect your social media accounts. This means Squarespace can either push information to or pull information from those accounts. Personally, I don't use this feature because I prefer having more control over how my posts are shared on social media.
Location Settings

If you have a physical location, you may choose to add it in here. This can be useful for getting your business listed on the Google map pack.
Phew! You made it!
That is everything you need to know about writing a Squarespace blog post, getting it styled and adjusting the settings.
I always recommend one final review before you publish your post but now it is time send it out to the world! 🌏🌐
More Like This


Tags